Years ago, I wrote a couple of blog posts about prefelts, but there are many details I didnât mention back then. Since I still get a lot of questions about the topic, I thought it would make sense to write a new, more complete and up to date series.
This first part caters to new felt makers, who I know are often a bit confused about prefelts.
If youâre more experienced, this won't be new to you. But, as I explore the topic further, there'll be more details that may be useful for you too. So, I recommend keeping an eye on the rest of the series, if this is a topic that interests you.
Weâll start by looking at what prefelts are, and then talk about how and when to use them. So, let's dive in!
Â
WHAT ARE PREFELTS?
As the name suggests, a prefelt is a partially felted piece of wool felt. In other words, itâs simply a stage in the wet felting process before the fibers fully compact.
That, of course, means a prefelt can be further felted. And that is precisely why prefelts are so inte...
A good wool layout is essential for many reasons. Itâll give your work stability, and itâll guarantee your felt is even. Itâs also the secret to a fine drapable piece with a beautiful finishing.
Hereâs a video showing you exactly how to create the perfect layout. If you donât feel confident with this part of felting yet, why not spend some time just making samples to practice.
You donât have to waste any wool with this exercise. You could just pre-felt the samples and use these pieces of pre-felt for future projects.
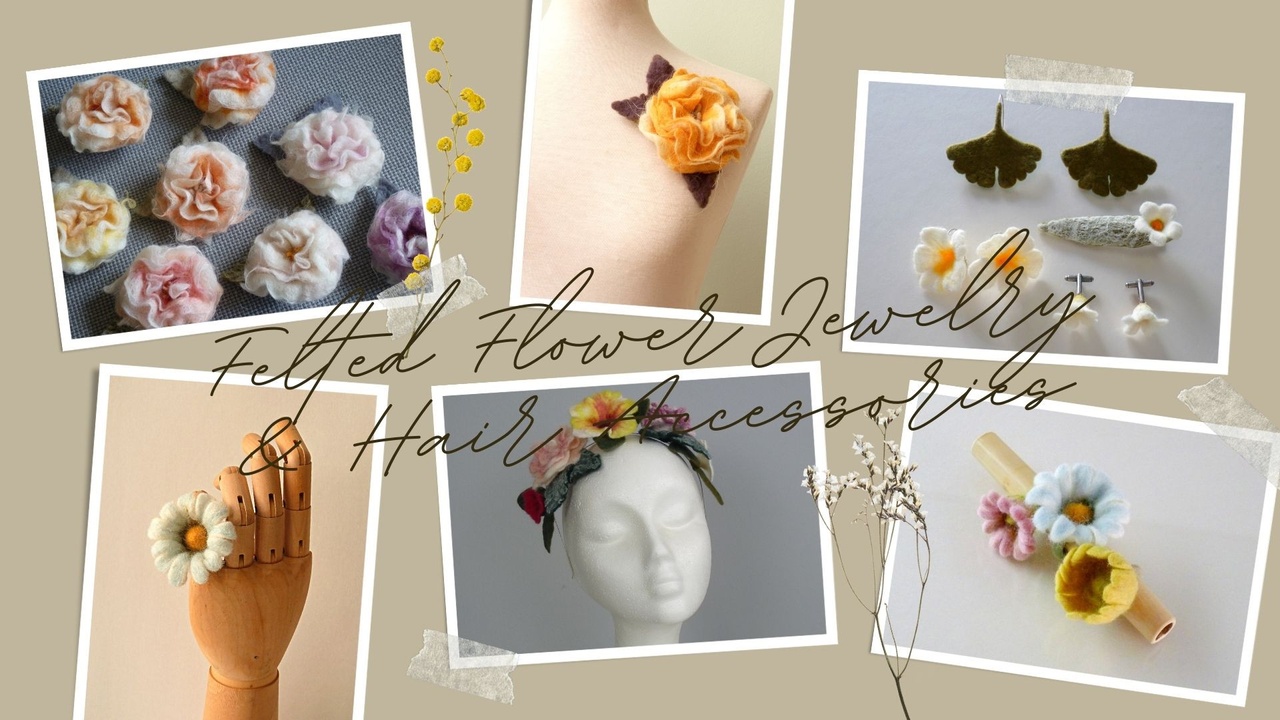
After finally relaxing from the experience of confinement and COVID, I returned to work at the beginning of September. My 2 weeks break took me to the Camino de Santiago - the Camino Frances - where I was surrounded by Nature and quiet.
Maybe that's what made me want to start felting flowers again :) So, I picked up some of my short video workshops and did a total makeover, converting them into a NEW flower jewelry and hair accessories course.
I had lots of fun exploring shape and color, and I created very simple, as well as more sophisticated flowers.
If you find this an interesting topic, I invite you to take a look at the class details. Registration opens tomorrow, September 25th. The course starts on October 2nd and has the duration of 2 weeks.
Feel free to respond to this email if you have any questions.
Talk soon!
If you're following my Instagram account, you know that I've been sharing photos of my new baby items for some time :)
The idea of creating more felted pieces for kids has been on my mind for long. I just think it's the perfect medium for babies: soft wool and silk, natural non-toxic fibers, environmentally friendly materials, washable and long lasting products. Just perfect!
In the past I've created workshops on baby hats, play food and - one of my best sellers - baby booties. I wanted to expand this collection with more complex pieces that could also allow me to work with more advanced felting techniques. And that's what I've been preparing for the last couple of months: an online course on how to wet felt your baby's booties and jackets.
This is a 3-week, step-by-step video course, that walks you through all you need to know to felt your baby's booties and jackets in 3 different sizes, 3 design variations and 3 felting techniques. It includes:
I often get questions about felting in the comment section of my YouTube channel. Yesterday, one came up that I thought deserved a longer answer. Since itâs a frequently asked question, it made sense to me to write a blog post on the topic.
Hereâs what Kathleen McKinney wanted to know: âHow do you know if youâve felted and fulled enough? How do you know when an item is finished?â
As itâs often the case in wet felting, I have to start by saying that it depends on what youâre making.
The general answer would be âdo the pinch testâ. If you pinch the surface of your felt and the fibers donât lift any more, that means your felt is ready (see video).
Â
But thereâs more to it than that, so letâs go into more details for different items:
There are thousands of ways you can decorate a wet felted project. Some just involve wool, others can include silk or other fabrics, as you know. This is then called Nuno felting. But today I bring you a sample that contains wool, silk and something else.
I wanted to show you an example of how you can use a transparent piece of silk to hold any type of synthetic material, that wouldnât otherwise attach to wool. In this case, Iâll be using a pre-felt and a piece of white silk chiffon with the same size as the pre-felt. Alternatively, you can lay merino wool tops or batts, and use light gauze instead of silk.
TIP # 1 â USE LIGHT GAUZE INSTEAD OF SILK TO MAKE YOUR EXPERIMENTS CHEAPER
Iâm also using circles of a synthetic golden fabric (that doesnât attach to wool), but you can choose countless other materials like small beads or sequins, for example.
If youâre making a sample, please remember to measure the size of the wool now and after shrinkage.
TIP # 2 â ALWAYS MEASURE YOUR SAM...
Are you going crazy with the âwhat is whatâ in terms of the wool for felting?
I do my best to avoid insider lingo, but the truth is thereâs no escaping. Youâll just have to learn a couple of new terms when it comes to this. Otherwise you risk not getting the right materials for your projects. So here is some of the terminology youâre bound to hear if youâre taking on felting:
Raw fleece is what you call the wool when itâs right off the animal and unwashed (that means dirty and greasy). This is not something you can normally get, unless you buy directly from a sheep farm.
Scoured fleece has been washed to remove lanolin and dirt, but it still has the lock structure. I use it to fill pillows or for dollâs hair, for example.
Wool batts, wool batting or carded wool is very similar to quilt batting. Itâs the result of removing the debris from the wool with a machine that breaks up the lock structure, and then going through the carding machine. The carder brushes and blends the fibers ...
Iâve been working in a new video workshop, which I hope to finish and post in the next couple of weeks. And the video tutorial I bring you today will be part of this workshop.
I wanted to share it with you, because I know there are so many questions about how to make a pre-felt.
Hope you enjoy it!
Talk to you soon!
Â
Am I happy to be back!!!
What started out as a couple of technology problems, ended up as a great example of Murphyâs Law. After having taken my tablet â where I store eBooks, notes, my calendar, and all sorts of information â to repair, my Internet stopped working, I had huge difficulties in getting it fixed because itâs August (and everything stops in August), and â last but not least â my laptop started giving me problems.
So, I convinced myself it was time to take it easy, and just let things take care of themselves. And, in the process, I had to skip a week of posting here.
But Iâm back to stay! And Iâm back with something new. I wanted to try a new format to answer some of the most frequent questions about felt, that donât require showing a process on video.
So, today Iâm going to dive into the following questions:
A felted piece that isnât completely felted is called a pre-felt, so itâs just the stage before ...
50% Complete
And let you know when there's a new blog post, tutorial or masterclass available.
Don't worry, I hate SPAM and promise to keep your email address safe.